Building Your Exhibitor/Sponsor Booth

The labels may be unique to your conference.
Not all features may be available for your booth.
Video tutorial:
Getting Started
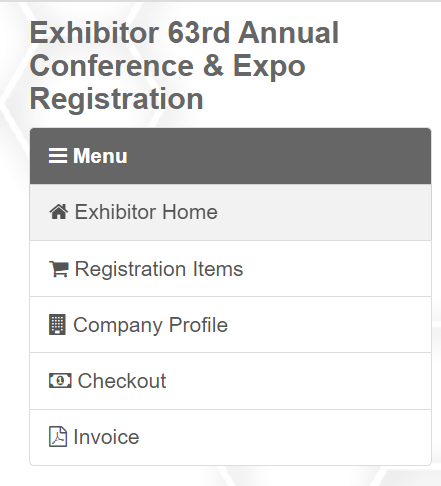
- Log into your Company Profile
-
Navigate to the Company Profile/Update Company/Update Virtual Booth/Update Exhibitor Profile Button (The left menu label may be unique to your conference.) from the home screen (button vernacular may change depending on your conference).
-
Updating Your Company Profile
- By default the
company information
page will load first. Please review the fields and update as required and when done click the
update profile
button at the bottom of the page.
-
-
Update your company Address under the Contact Info Tab
-
Manage Booth
- Click Manage Booth
-
There are several left menu items and depending on your sponsor level or what items you have purchased their availability may vary.
Company Resources:
-
Company resources are Videos, PDFs and Links.
To add a resource:
-
Click Add Resource, a pop up will ask for a type, please select the type to see the next steps for the resource.
-
-
Add a label, this will display to users in the virtual conference.
-
PDFs will need to be uploaded; Links please provide the URL; Videos must be a Vimeo or YouTube URL, videos must be public.
-
To edit/delete a resource:
-
Click the Pencil and square Icon at the end of the row
-
Edit desired fields and click update
-
Click Delete to delete the resource
-
The resources will display in the order set on this page, to reorder click and drag the 3 lines beside the resource name or image
to the desired position.
Company Products:
-
This may not be available to you. If it should be present, but is missing please speak to your conference administrator.
-
Add a new product:
Click Add Product
-
-
A new page will allow you to add:
-
Product Label
-
Feature Image for your product
-
Product Description (this is HTML Rich)
-
A primary contact for the product
-
Tag it a a new/featured product
-
Select Organizational/Product Tags if applicable.
-
Click Add to save the product
-
Click Cancel to delete and go back to company products page.
-
Once a product is created add Product resources:
-
Below the main product information click add resource .
-
-
Select the type of resource you'd like to add: PDF, Link or Video (Video's must be YouTube or Vimeo URLs).
-
Label the resource.
-
Add the URL or File depending on the resource type.
-
The Products will display in the order set on this page, to reorder click and drag the 3 lines beside the name
Edit a product:
-
Edit your existing products by clicking the pencil icon at the end of the row
Raffle & Giveaways
Create a New Raffle Prize:
- Click Add Item
-
In the pop-up add the raffle/prize name and upload a prize image.
-
JPG or PNG files only
-
Recommended image size: 500px by 500px
-
Click upload to save the raffle
- An endless number of prizes can be given away, but there will be only one raffle box.
- You can run a raffle multiple times if you want to choose several winners.
- To run your raffle, click on the Analytics tab, and then the Raffle tab in the exhibitor microsite.
Raffle Codes:
-
This feature will need to be enabled for your conference to be able to use it.
-
Require attendees to enter in a code before they are able to enter the raffle.
-
Codes are typically provided by speaking to a company representative in the Video chat room within the booth.
-
To Edit your raffle code click Manage Raffle Code. In the pop-up enter in your desired raffle code and hit save.
-
Leave it blank if you do not want a raffle code.
-
The raffle prizes will display in the order set on this page, to reorder click and drag the 3 lines beside the name
-
Edit your existing raffle prizes by clicking the pencil icon at the end of the row
-
Enhanced Booth
Booth Header
-
Upload this Image by clicking upload in its row
-
Image Dimensions 485 x 80 pixels
-
This image is static and will not rotate
-
Delete the image by clicking delete in the row.
-
This image will go above your featured video
Booth Side Roll Up Images
-
Booths can have up to 5 images they will rotate in a random order
-
Upload this Image by clicking upload below the title
-
Image Dimensions: 136 x 380 pixels - max 5
-
Delete one of your roll up images by clicking delete in its row.
Booth Background Image
-
Upload this Image by clicking upload in its row
-
Image Dimensions 1280 x 720 pixels
-
Select Feature Video
-
You must have uploaded/added a company resource video first
-
A list of your company resource videos will appear in a drop down.
-
Select one by clicking the drop down and clicking the title
Preview Booth
-
Preview your booth and ensure it is ready for the virtual conference!
-
Test your computer to ensure you are able to use the virtual conference video rooms
-
Test your computer here: https://meet3.econference.io/test
-
Read our troubleshooting document here if you do have issues
Staff
Add and Edit Staff Contacts:
- Click the Staff Registration Screen
Adding Discounted Staff?
Adding Non-discounted Staff?
- Here is a helpful guide.
What does Public or Private Staff Mean?
- Once a staff member is registered for the conference, they can be set a public or private.
Public:
- Public means that they will be a viewable staff contact from the exhibitor booth and other attendees can reach out to them directly. It will also create their own personal video chat room within your virtual booth so they can host private meetings and discuss with attendees in a one on one manner.
Private:
- Private means that they will not appear in your booth and will not have a private video chat room.
Scheduling Staff Availability:
- Click Staff Availability
- The dates available are limited to the conference start and end date and each of your public facing staff members will have their own row
- Click on a cell within the staff contacts row to add a time
- Click Save to save that time slot or click more details to edit the time further.
- By default time slots are set in 15 minute increments.
Related Articles
Enhanced Virtual Exhibitor Booth Display
We have created a more realistic visual for our virtual exhibitor booths We wanted to give our clients more options and flexibility in offering exhibitors and sponsors more design control over their virtual booths, without limiting the booth ...Populating an Exhibitor or Sponsor booth from the admin site
If an Exhibitor of Sponsor is having difficulty uploading documents from their microsite, you can assist them from your admin site. 1. From the Dashboard, in the left menu click on the Companies Module 2. Find the company and click on it 3. Click on ...Entering Your Exhibitor Booth
Labels may be different in your virtual conference. Login to the Virtual Conference Platform. Click here for assistance. Exhibitor/Sponsor Staff will enter the same way a regular attendee enters. Exhibitor/Sponsor Staff may have Exhibit Hall Only ...Creating Exhibitor Discounts
If you want to create Booth Discounts linked to the Floorplan, refer to: https://support.x-cd.com/portal/en/kb/articles/how-to-create-a-booth-discount Create a discount for an Exhibitor item purchase Click Dashboard Click Exhibitor module Click ...Beginner's Guide: Preparing your Exhibitor Registration Form
The purpose of this article is to provide a series of steps in the process of preparing your Exhibitor registration site. This article is useful for beginners, but also to those who may need a refresher. Each of the below steps correspond to one or ...